Microcontrollers are compact computing systems that reside on a single integrated circuit, acting as the electronic brains that power modern devices. When looking for a microcontroller definition, you will find that these self-contained systems include a processor, memory, and programmable input/output peripherals. Unlike general-purpose computers, these specialized devices are designed for specific tasks within electronic devices.
At the heart of every microcontroller lies the microcontroller CPU, which processes instructions and manages operations. The microcontroller unit definition encompasses not just the processing core, but also the essential components that make it a complete system: RAM for temporary data storage, ROM or flash memory for program storage, and various interfaces for connecting to the outside world. Think of it as a miniature computer that's optimized for controlling specific functions rather than running multiple applications.
These remarkable devices operate by executing programs stored in their memory, continuously monitoring inputs, and controlling outputs based on their programming. They're designed to be reliable, cost-effective, and energy-efficient, making them ideal for embedded applications where a full computer system would be impractical or unnecessary. Their ability to perform real-time operations with minimal power consumption has revolutionized product design across countless industries.
The architecture of modern microcontrollers has evolved to include sophisticated features that enhance their capabilities. Many now incorporate analog-to-digital converters, enabling them to interface directly with sensors and real-world signals. They often include multiple communication interfaces such as SPI, I2C, and UART, allowing them to interact with various peripheral devices and other systems. Advanced power management features enable them to operate efficiently in battery-powered devices, while built-in security features protect against unauthorized access and tampering.
Definition by Digi International
A microcontroller is a small, self-contained computer built onto a single integrated circuit that is designed to control specific tasks in embedded systems. Unlike a general-purpose computer, it combines a CPU, memory, and input/output peripherals on one chip so it can read inputs, process data, and control outputs efficiently. The CPU acts as the brain, executing instructions stored in program memory, which is usually non-volatile flash or ROM. The microcontroller also contains RAM for temporary data during operation, and sometimes EEPROM for storing settings. It communicates with the outside world through input/output pins and built-in peripherals such as timers, analog-to-digital converters, pulse-width modulation modules, and communication interfaces like UART, SPI, and I²C.
Microcontrollers are built using different architectures. In a Harvard architecture, program memory and data memory are separate, allowing faster operation because instructions and data can be accessed simultaneously. In a Von Neumann architecture, both instructions and data share the same memory and bus, making the design simpler but often slower. Many modern microcontrollers use a modified Harvard architecture, combining elements of both. They are also classified as RISC or CISC. RISC microcontrollers use a small, simple instruction set for faster execution and efficiency, while CISC microcontrollers use more complex instructions to perform tasks in fewer lines of code.
Microcontrollers are used to sense, decide, and act. They can read inputs from buttons and sensors, process the data using programmed logic, and control outputs such as motors, displays, or lights. They can also communicate with other devices, store data, and run control algorithms. Because they are compact, low-power, and inexpensive, microcontrollers are used in a wide range of applications including consumer electronics like washing machines and remote controls, automotive systems such as engine controllers and airbags, industrial automation equipment, smart home and IoT devices, medical instruments, and communication hardware. In short, microcontrollers are the small computers that quietly control the behavior of countless everyday electronic devices.
Definition by ChatGPT
Prompts:
What is a microcontroller? (talk about architectures) (talk about what they're made up of) (talk about what they can do) (talk about where they're used in)

Turn this into a paragraph.ATmega328P is a low-power CMOS 8-bit microcontroller based on the AVR® enhanced RISC architecture. Its versatility, ease of use, and support for various development environments have made it a great choice for numerous applications; these include Arduino boards, industrial automation, and consumer electronics. The microcontroller influences motor control systems significantly, providing precise modulation of electrical signals for smooth motor operations. This microcontroller especially shines when used in drones and robots, where movement precision is a core requirement.
Reference: Arduino Docs, Vyrian, and IC Components Limited
The STM32 microcontrollers use the ARM Cortex-M® architecture, which offers a strong and efficient computing platform. The Cortex-M® cores provide a balance of performance, power efficiency, and versatility, making them ideal for a wide range of applications.
The STM32F103 is a popular choice among electronics enthusiasts, hobbyists, and professionals due to its low power consumption, high performance, and rich peripheral set. This microcontroller is commonly used in various applications, including industrial automation, robotics, automotive, and consumer electronics.
For example, the STM32F103 can be used in a CNC machine to control its motors and other peripherals, or in a smart home system to manage its various sensors and actuators. This microcontroller can also be used in a quadcopter or similar vehicles to handle its flight control algorithms and sensors. The STM32F103 is a versatile and powerful microcontroller.
Reference: SMH Technologies and Reversepcb
The ESP32 Architecture is based on the Xtensa LXn CPU cores. The Xtensa CPU cores use a modular, flexible 32-bit RISC architecture. A RISC device is a microprocessor architecture that uses a small effective set of programming instructions. The small set of programming instructions aids RISC architectures Xtensa processor to scale from a small cache-less controller to a high-performance digital signal processor.
ESP32 comes with an on-chip 32-bit microcontroller with integrated Wi-Fi + Bluetooth + BLE features that targets a wide range of applications. It is a series with low-power and low-cost.
ESP32 microcontrollers are generally used for IoT (Internet of Things) projects. IoT is basically physical objects that are embedded with sensors, processing ability, software, and other technologies that connect and exchange data with other devices and systems over the internet or other communication networks.
Reference: DigiKey, ElectronicWings, and Wikipedia
All PIC microcontroller family uses Harvard architecture. This architecture has the program and data accessed from separate memories, so the device has a program memory bus and a data memory bus. This improves the bandwidth over traditional von Neumann architecture.
Microcontroller PIC16F877A is one of the PICmicro Family microcontrollers, which is used from beginner to professionals. The superiority of PIC16F877A compared to other 8-bit microcontrollers is its speed of code compression.
The 16F877A is a capable microcontroller that can do many tasks because it has a large enough programming memory of 8k words and 368 Bytes of RAM. This is enough to do many different projects.
This microcontroller is normally used in embedded projects like home automation systems and bank security systems.
Reference: EmbeTronicX and DesignSpark
A toolchain is a collection of programs that transform human-readable source code into executable machine code for a specific processor and system.
Toolchains exist to provide a reliable, repeatable, and automated way to build software.
Without a toolchain, developers would manually run and coordinate each tool, increasing errors and complexity.
Transforms high-level code (C, C++) into machine code or intermediate code.
Examples: GNU Compiler Collection, Clang, IAR Systems, Keil
Converts assembly language into binary instructions.
Example: GNU Assembler
Combines object files and libraries into a final executable.
Example: GNU Linker
Provide common functions (math, memory, I/O).
Examples: glibc, libstdc++
Allows step-by-step execution and inspection.
Examples: GDB, OpenOCD, SEGGER J-Link
Native Compilation
Build and run on the same machine (desktop software).
Cross-Compilation
Build on Host PC → Run on Target device (embedded systems).
Cross-compilation is required because embedded devices cannot run full compilers.
Desktop Toolchains
Embedded Toolchains
Toolchain
IDE
Examples of IDEs: Visual Studio Code, Eclipse IDE, STM32CubeIDE, Arduino IDE
Clicking Build in an IDE simply runs the compiler, linker, and other tools behind the scenes.
Toolchain = Engine
IDE = Dashboard
Choose the target architecture (MCU/SoC), install the appropriate toolchain, and configure the project environment.
Write application code, hardware drivers, and configuration files using C, C++, or Assembly.
Use the toolchain to preprocess, compile, assemble, and link source files into a final firmware image.
Upload the compiled firmware to the target device using a programmer or debugger.
The device boots, runs startup code, and begins executing the application.
Inspect program behavior using breakpoints, stepping, register/memory views, and logging interfaces.
Modify code and repeat build–flash–debug cycle.
Requirement Analysis → Code → Compile → Link → Flash → Run → Debug → Repeat
The development workflow might differ according to the toolchain and architecture you're using.
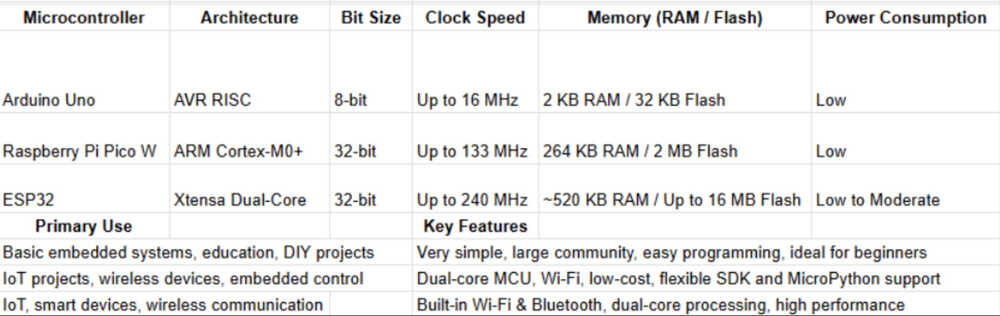
The Arduino Uno is based on an 8-bit AVR RISC microcontroller and is commonly used in small embedded systems and educational projects. It is widely popular among beginners and hobbyists due to its simplicity, large community support, and easy-to-use development environment. Known for low power consumption and straightforward programming, the Arduino Uno is a preferred choice for basic embedded applications and rapid prototyping.
The Raspberry Pi Pico W is built around a 32-bit ARM Cortex-M0+ dual-core processor and is designed for low-cost, high-performance embedded systems. It includes built-in Wi-Fi, making it suitable for Internet of Things (IoT) and wireless applications. The Pico W balances performance and power efficiency, and supports both C/C++ using the Pico SDK and MicroPython, making it flexible for a wide range of projects.
The ESP32 is a 32-bit dual-core microcontroller designed specifically for IoT and wireless communication applications. It features built-in Wi-Fi and Bluetooth, high clock speeds, and strong processing capability. Due to its connectivity features and versatility, the ESP32 is widely used in smart devices, cloud-connected systems, and advanced embedded applications.
Basically, the experiment will be like this:
Repeat with another microcontroller.
Compare the toolchains based on how they acted in the experiments.
We will use code for blinking a LED for the experiment.
Arduino Uno, PicoW, and ESP32
| Category | Arduino IDE (Uno) | Arduino CLI (Uno) | Thonny + MicroPython (Pico W) | Pico SDK + CMake | ESP32 + ESP-IDF | ESP32 + PlatformIO |
|---|---|---|---|---|---|---|
| Compiler | avr-gcc | avr-gcc | None (interpreted) | arm-none-eabi-gcc | xtensa-esp32-elf-gcc | xtensa-esp32-elf-gcc |
| Linker | GNU ld (hidden) | GNU ld (visible in logs) | None | GNU ld (visible) | GNU ld (visible via build logs) | GNU ld (partially visible) |
| Build System | Arduino internal | Arduino CLI build system | None (interpreted) | CMake + Make | CMake + Ninja | PlatformIO build system |
| Flash Method | Serial bootloader | Serial bootloader | UF2 firmware + USB file transfer | UF2 drag & drop | esptool over serial | esptool via PlatformIO |
| Toolchain Visibility | Hidden | Partially visible | Fully hidden | Fully visible | Fully visible | Partially visible |
| Debugger Type | Serial print | Serial print | REPL console | GDB + SWD (optional) | GDB + JTAG (optional) | Serial print / GDB (optional) |
| Typical Language | C/C++ | C/C++ | Python | C | C/C++ | C/C++ |
| OS Used | Bare-metal | Bare-metal | MicroPython runtime | Bare-metal | FreeRTOS (built-in) | FreeRTOS (via framework) |
| Libraries Provided By | Arduino Core | Arduino Core | MicroPython standard modules | Pico SDK | ESP-IDF | Arduino core or ESP-IDF (selectable) |
Downloading the IDE from here.

Click the part next to the buttons, then click the pen icon.
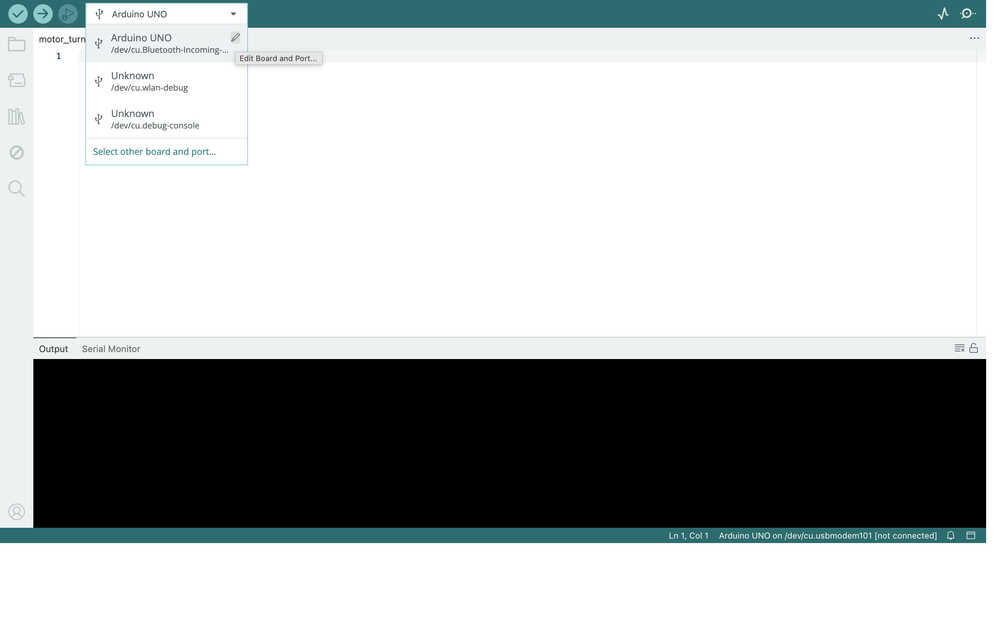
A section opens. Select Arduino Uno and select the port you connected your computer to Arduino Uno with.

Wrote a code to blink an LED.
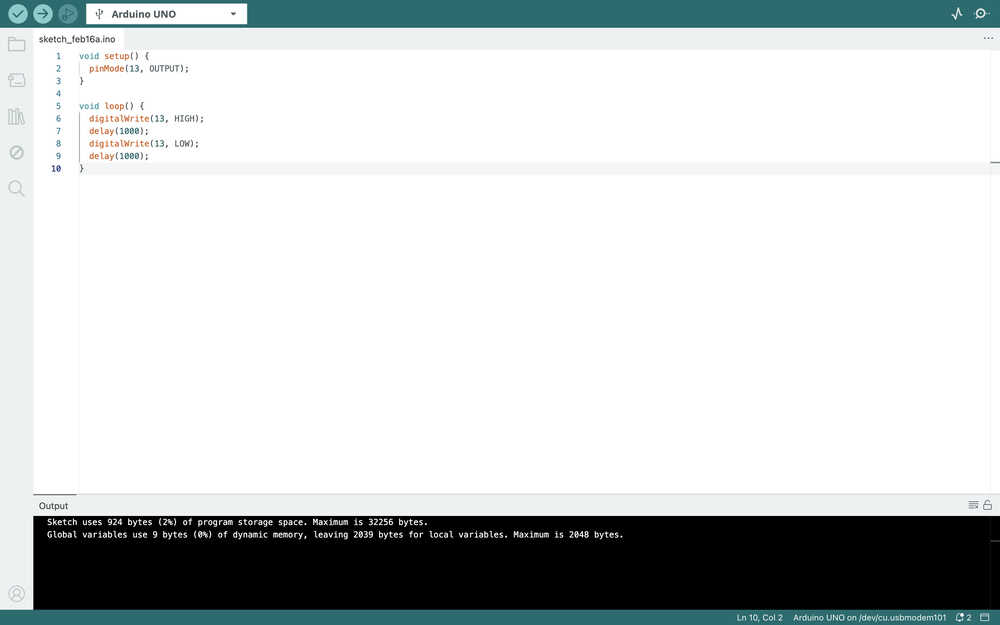
The LED is blinking.
As it can be seen, the UI is quite simple and easy to navigate through. The code execution speed is good too.
Download Arduino CLI.

Initialize a config file.

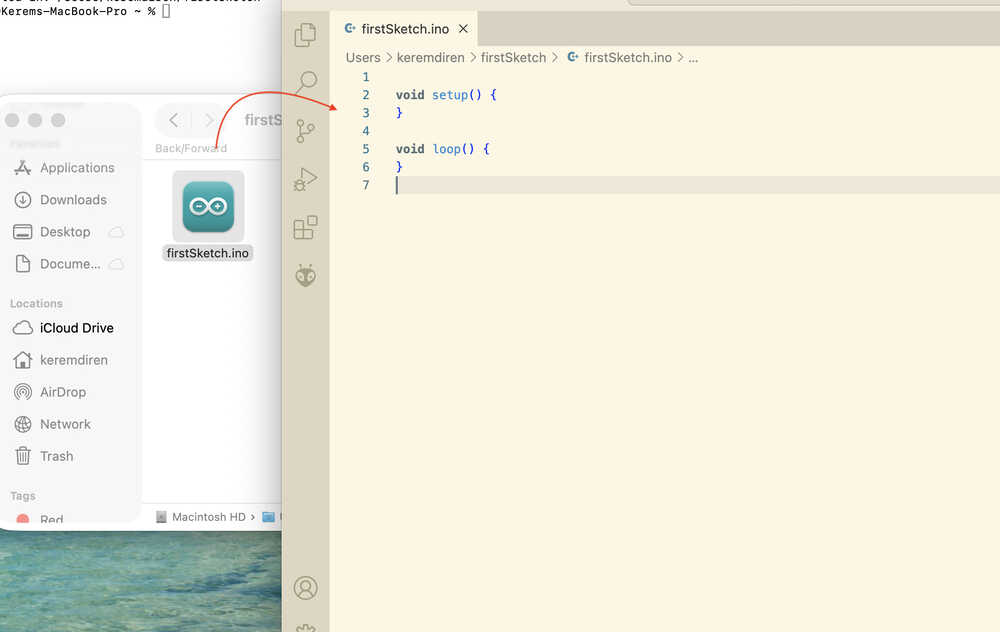
Created a new sketch with the name firstSketch.

Open the file that was just created in the IDE you like. I opened it in VSCode.
To connect the Arduino Uno to my computer, I wrote this to the terminal:

Update the local cache of available platforms and libraries.
After connecting the Arduino Uno with a cable, you can write this to check the connection ports. In my case, the one with (USB) is the one my Arduino Uno is connected to.

Now, I'll install the needed FQBN for my board. You can see it next to your board if it was detected. If your board shows unknown, you can see a list of all boards and their FQBN's by writing arduino-cli board listall mkr

Mine was already installed.
You can compile your file by writing this (change the FQBN and the name of the file to what yours is).

Write this to upload your code to your board. Don't forget to change the port, the FQBN, and the file name according to what you're using.

The LED is blinking.
From what I've experienced, using Arduino CLI takes more time than Arduino IDE; however, it lets you use the IDE you want and it gives you much more control in each step of executing your code in your microcontroller.
Disclaimer: For our work with Raspberry Pi Pico, we used the W version, therefore if you are using a different version, the process might differ.
First, I opened Thonny.
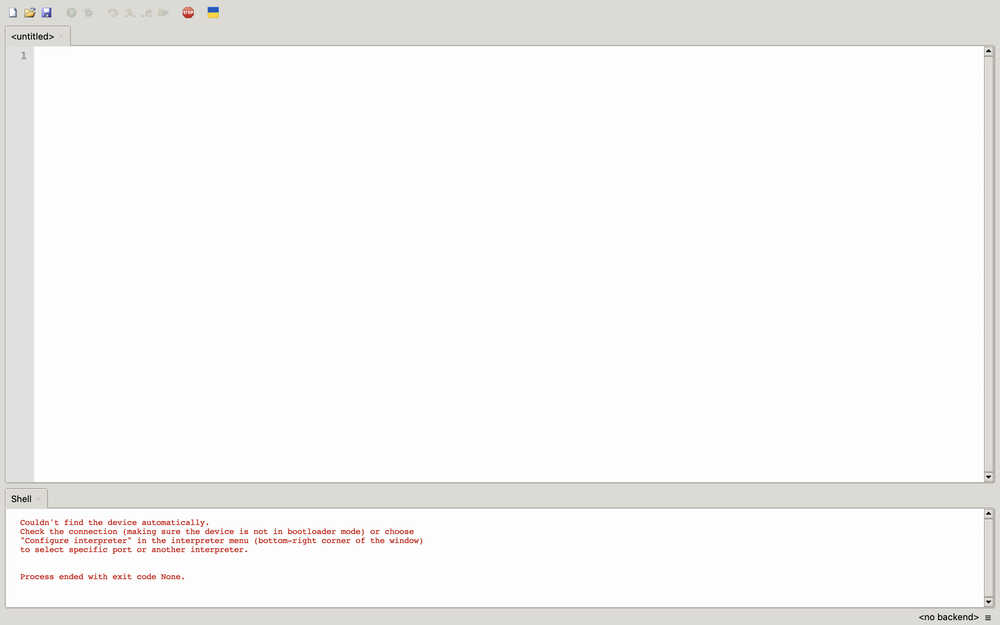
I selected the options menu from the tools menu.
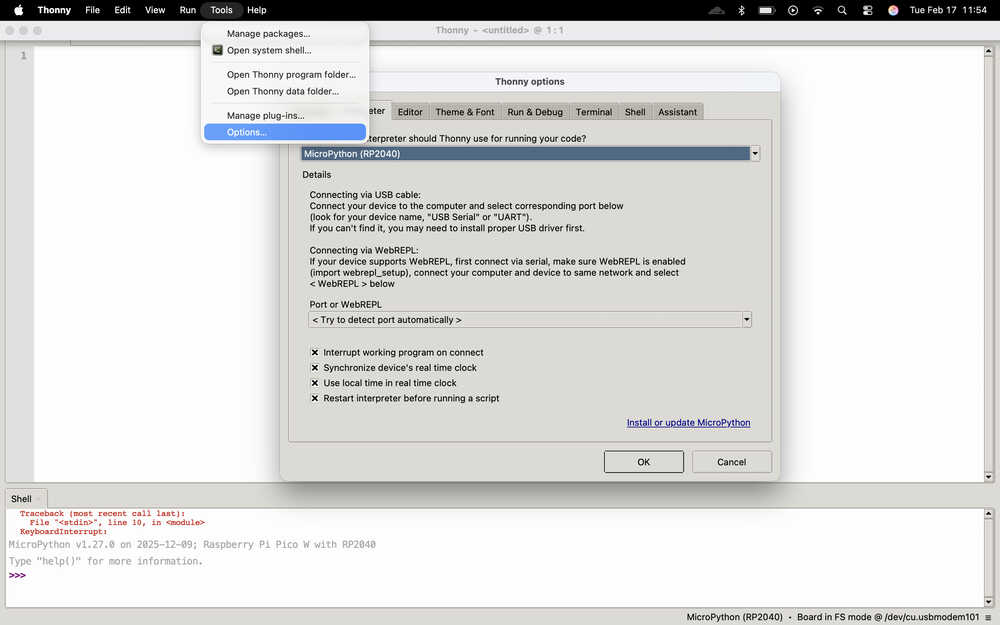
I selected the interpreter I am using (micropython for RP2040) and clicked the "install or update" button.
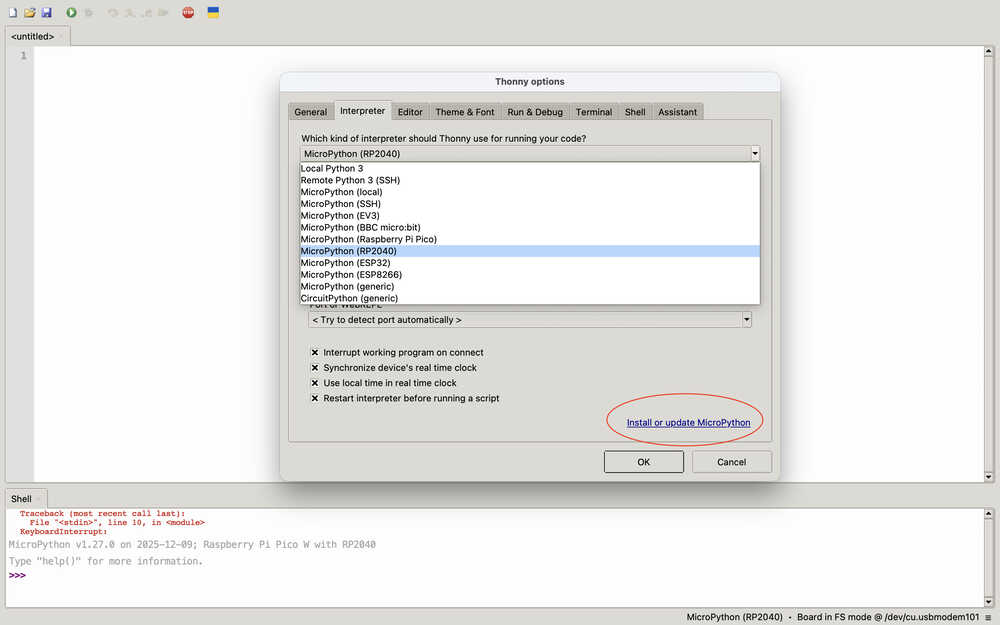
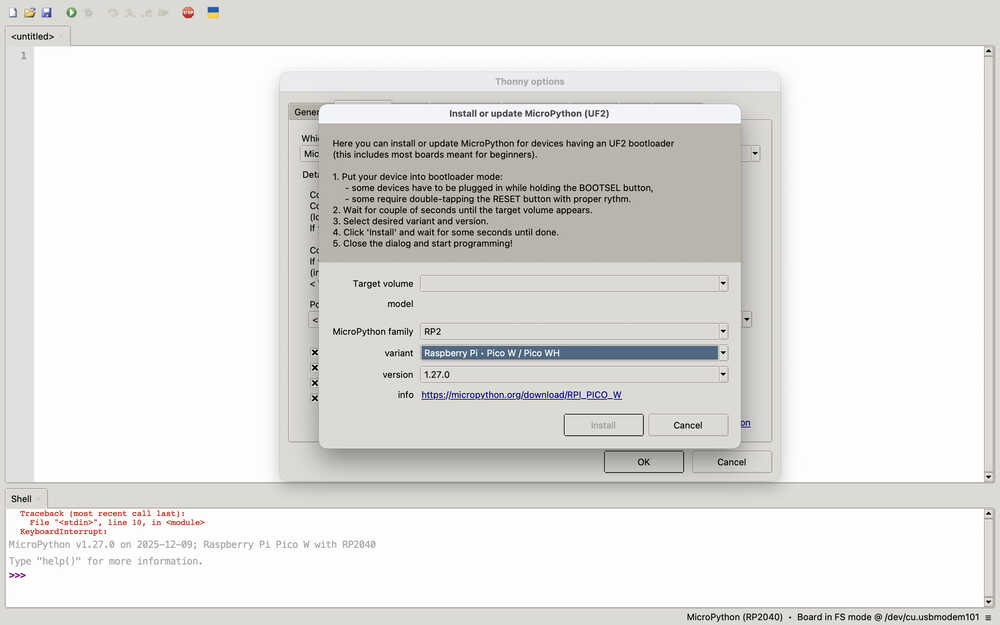
I selected the RP2 family and selected the Pico W variant. Then, I clicked "install".
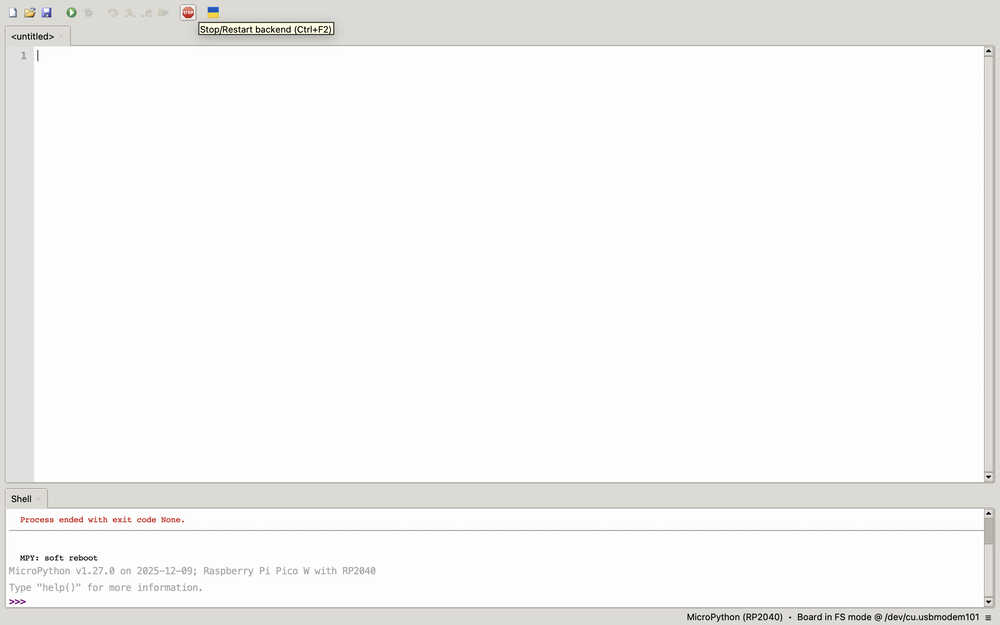
I connected the Pico to my computer with a cable. Then, I clicked the "Stop/Restart" button to make the connection between Thonny.
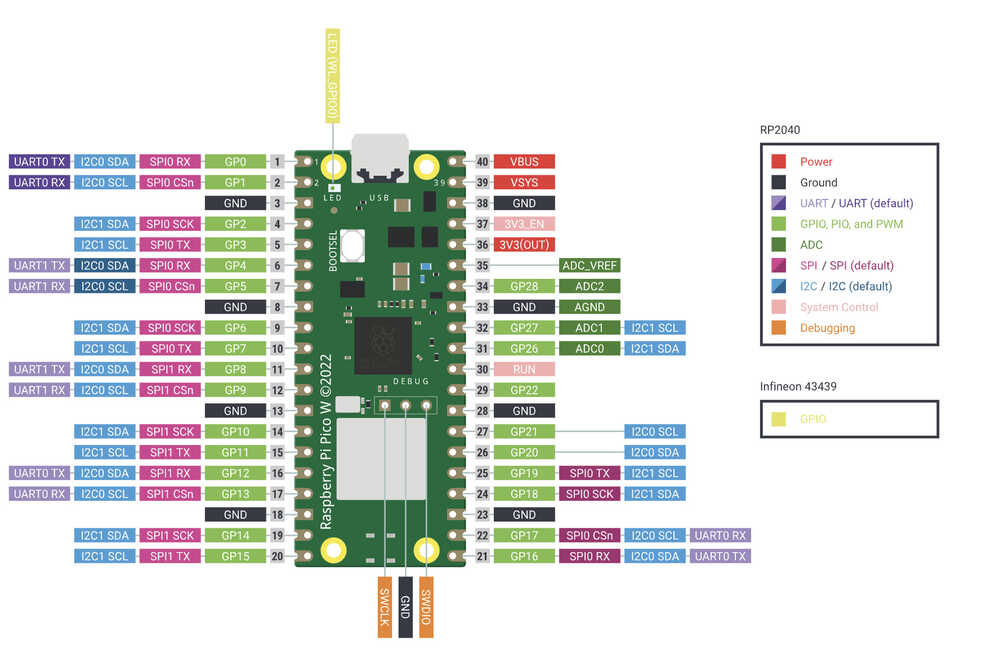
Here you can find Pico W's pins.
Because I don't know micropython, I just asked ChatGPT Give me LED blinking code for pico w. Here's the code:
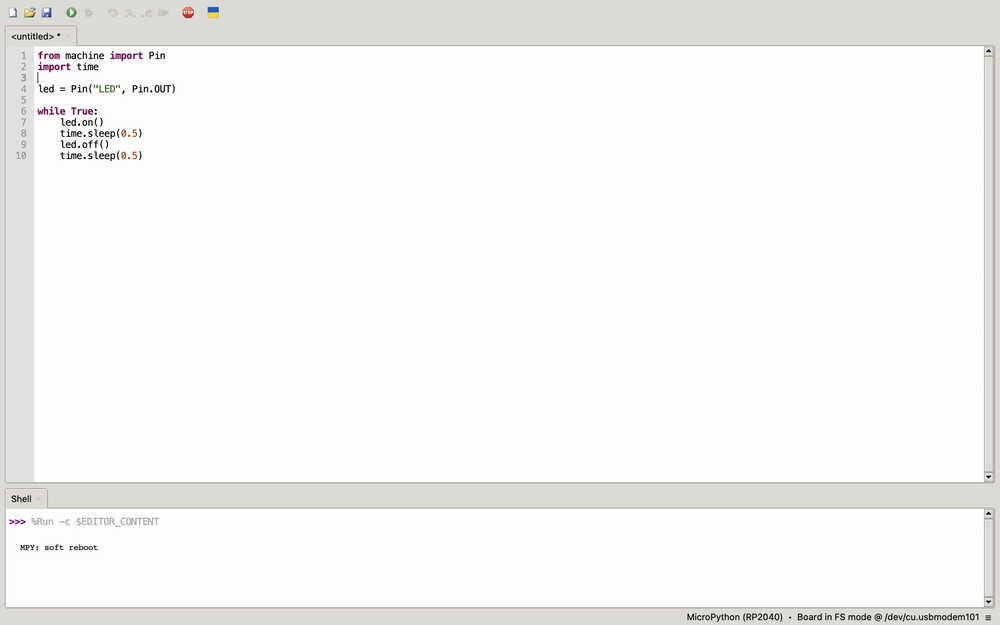
The LED blinking:
For me, Thonny was pretty easy to use. It was easy to connect Pico W to it. Basically, the UI was good. Because Thonny doesn't use a compiler and instead uses an interpreter, it has many advantages and disadvantages compared to something with a compiler. Basically, it's easier to develop code and test it using Thonny; however, for example, it uses higher memory than something with a compiler. This means that Thonny isn't that good for a project that is stingy in memory; however, it's quite good for testing something you created.
Cool tutorial to follow what we did: https://projects.raspberrypi.org/en/projects/get-started-pico-w/0
Grab your pico and connect the small end of your micro USB cable to the Raspberry Pi Pico W.
Hold down the BOOTSEL button on your Raspberry Pi Pico W.
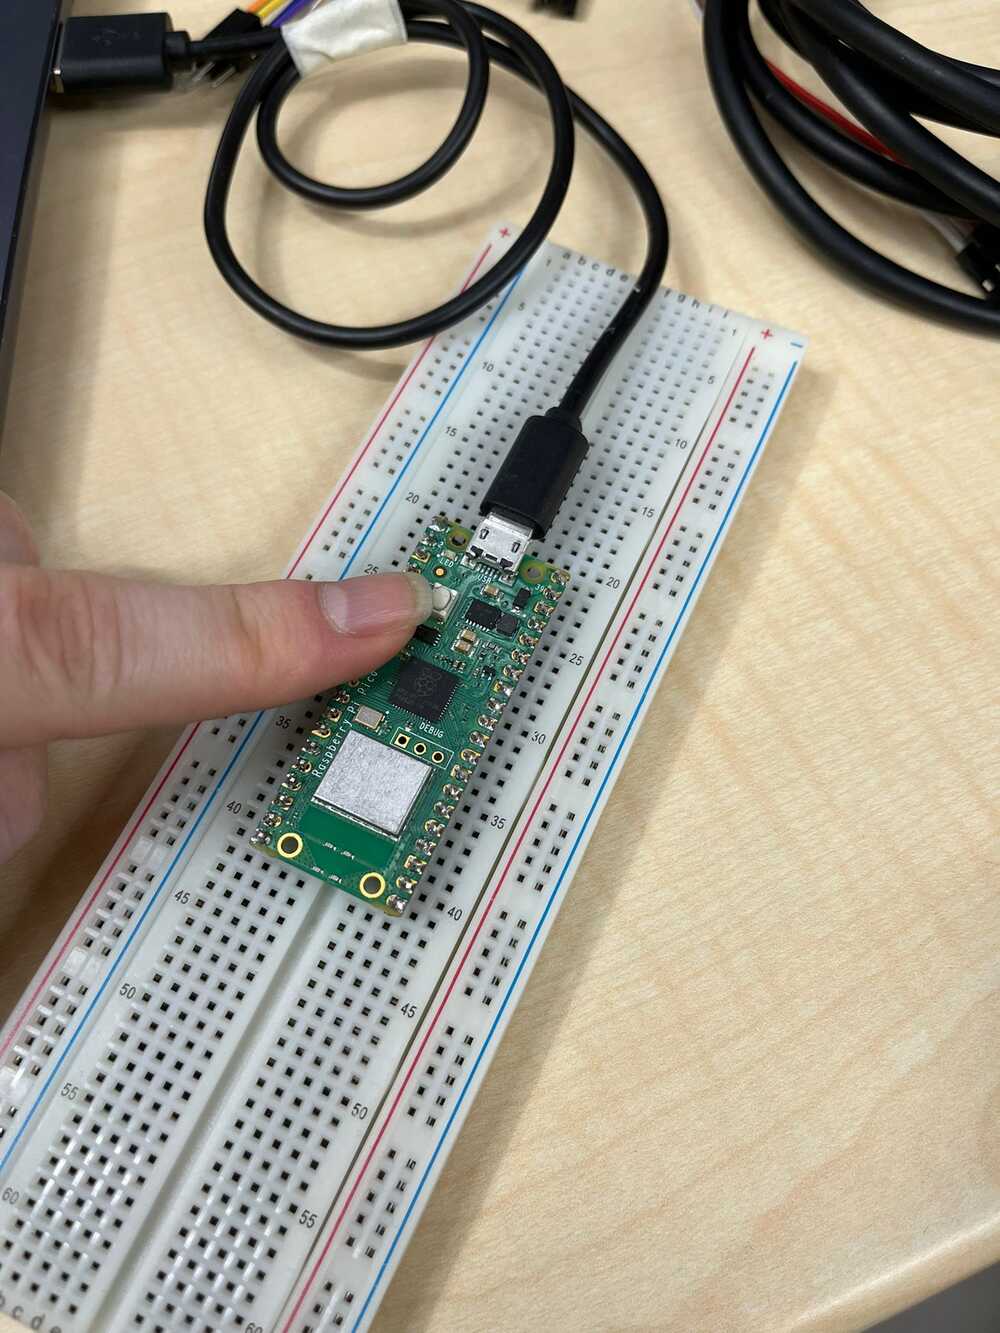
Connect the other end to your desktop computer, laptop, or Raspberry Pi.
Open your file explorer, and find your Pico's storage.
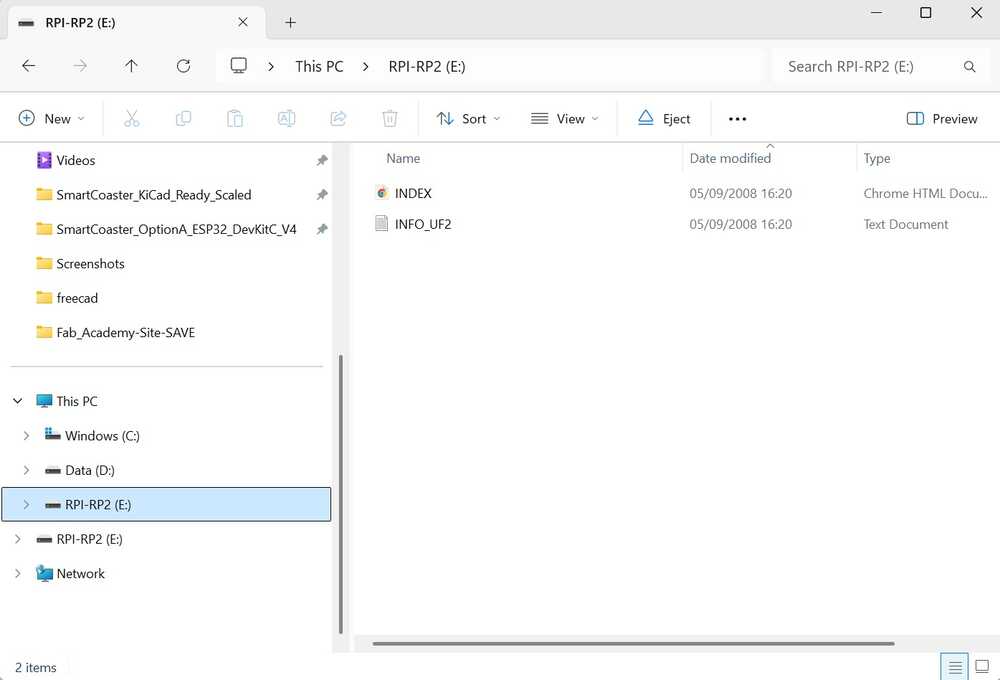
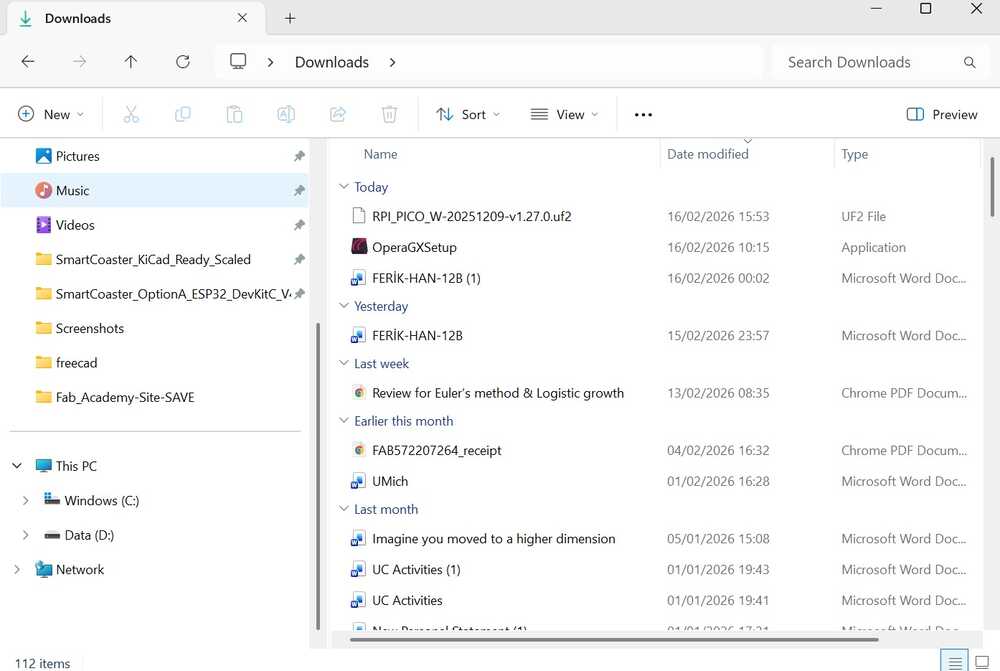
Transfer the file that we downloaded from the "Get started with Pico W" website. The file might differ depending on the model of your Pico.
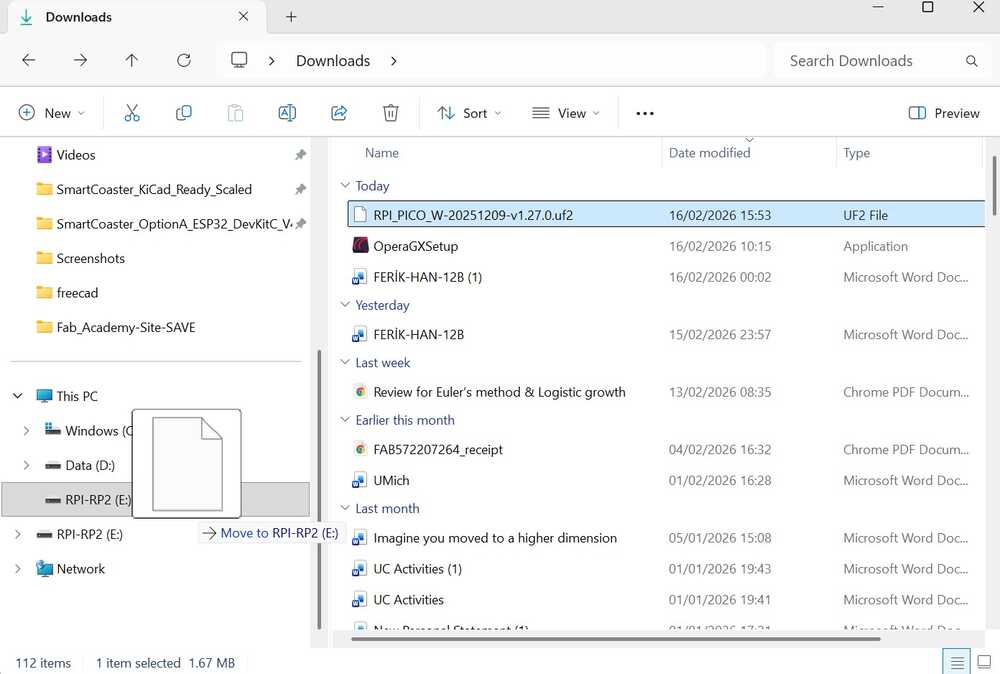
Extra: You may use Thonny to check whether the pico is booted or not, or you might just directly look over the folder of pico. If the folder is gone, then you are on the right track.
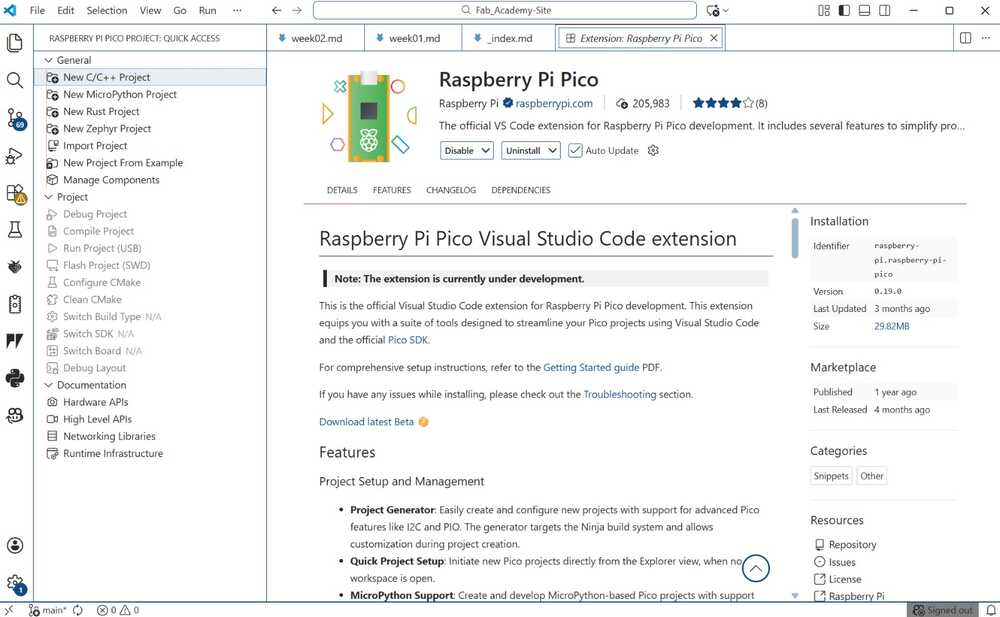
Now open up VSCode (You can also do this with terminal and powershell, but its much harder to maintain as it requires more work to do), and download the Raspberry Pi Pico Visual Studio Code extension. You can find the extension from the left side bar. After that, again on the left side, create new C/C++ Project.
Disclaimer: For Windows you might need to download Ninja Build for CMake beforehand because VSCode gave error when I tried to run my project without Ninja. After you download it, you need to drag that into your System32 Folder in your computer. Besides, if not downloaded, it might also want you to download Python 3 into your computer.
When you create your project, it will open up a new tab.
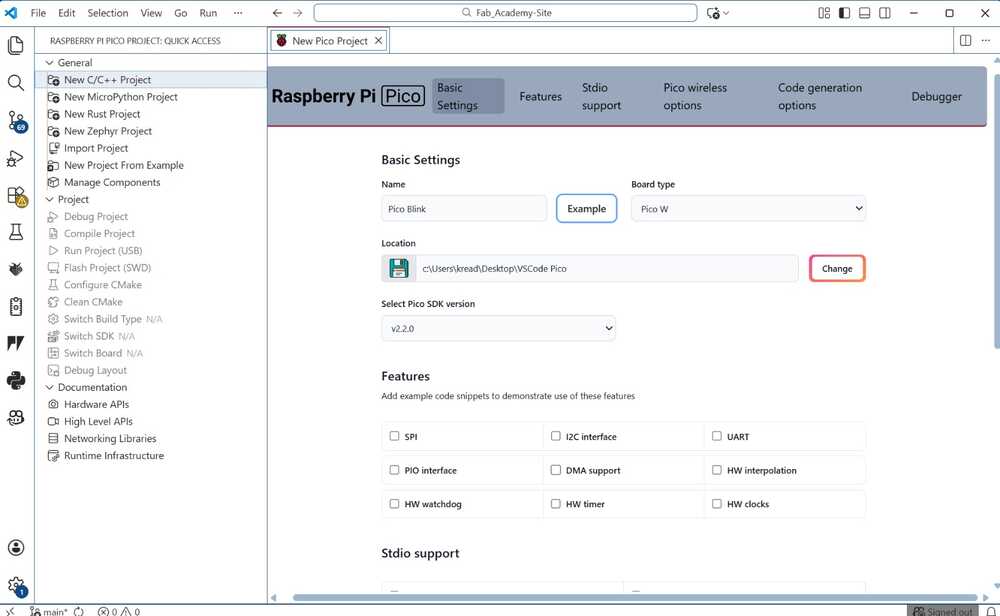
Here, you need to fill the given: Project Name and Board Type. You can fill these as you desire. Later, select the latest SDK version for your project. Also, for the location of the project, I created a new folder just for the project, which is what I recommend and it is what I did.
Error: The project name must be all non-capital letters and it should now have spaces.
Disclaimer: The first project may take 5-10 minutes to install the toolchain. It happened for me.
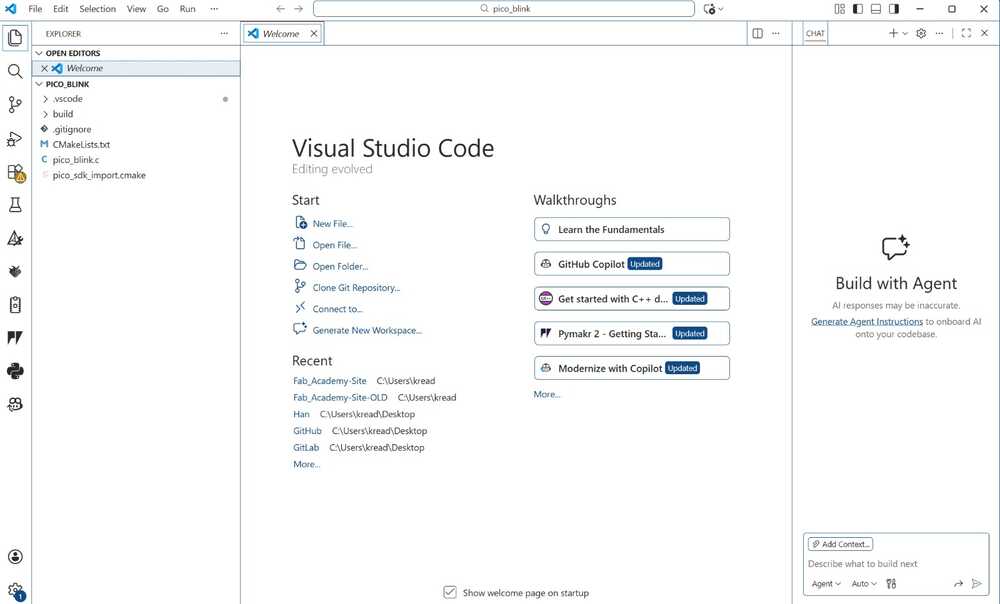
After its successfully downloaded, we will now import the project from the folder that we saved our project from. And, it should open a space like this.
Click on the Pico icon again. The extension sidebar contains some quick access functions. Click on the Pico icon in the side menu and you'll see Compile Project. Hit Compile Project and a terminal tab will open at the bottom of the screen displaying the compilation progress.
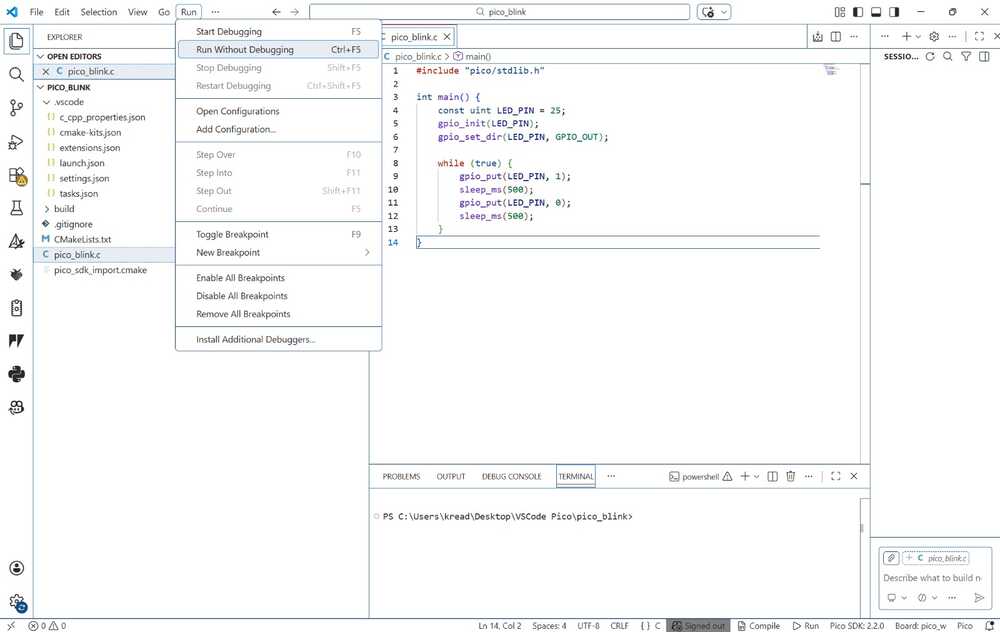
Get back to your pico_blink.c file (This might be in a different name as you named it).
Transfer the code below.
#include "pico/stdlib.h"

int main() {
    const uint LED_PIN = 25;
    gpio_init(LED_PIN);
    gpio_set_dir(LED_PIN, GPIO_OUT);

    while (true) {
        gpio_put(LED_PIN, 1);
        sleep_ms(500);
        gpio_put(LED_PIN, 0);
        sleep_ms(500);
    }
}
and select run without debugging from the Run tool on the top bar.
Here is the Pico W blinking video.
The overall process of running a Pico W through CMake and VSCode was tough because we encountered a lot of errors and it was complex, though trying do it through terminal was harder. In short, utilizing Thonny and coding our Pico with MicroPython is more simple, which is what we recommend for user to do.
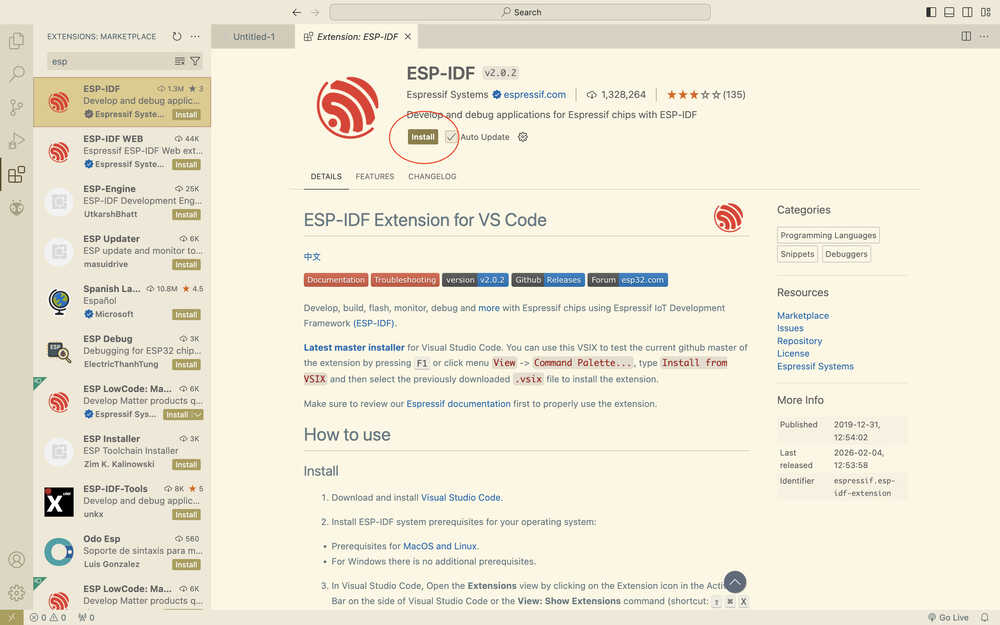
From VSCode, opened the extensions part, wrote ESP-IDF to the extensions part, and clicked install.
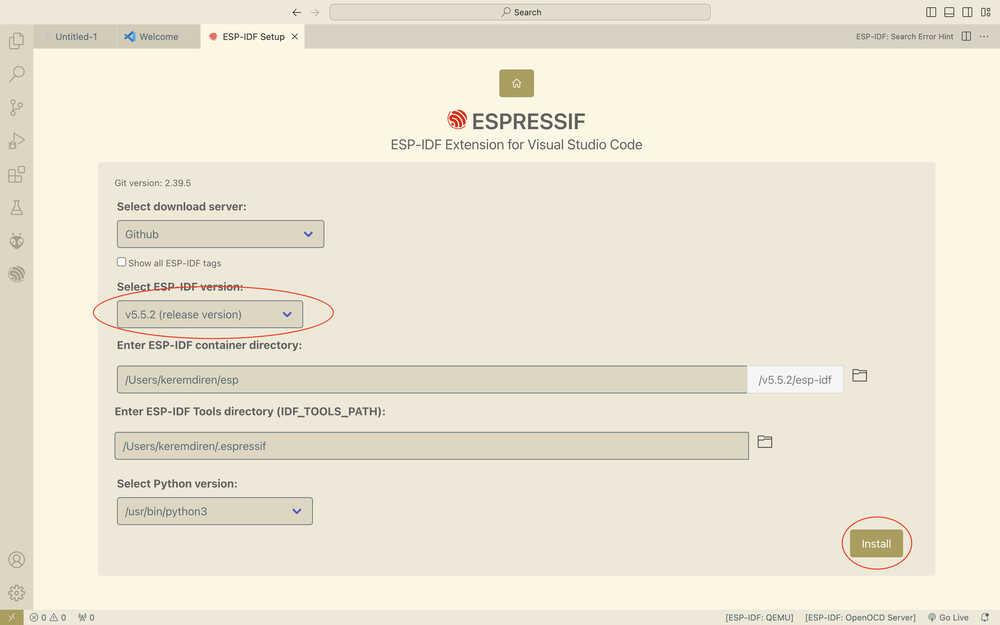
Clicked "Configure ESP-IDF Extension".

In the menu that opened, clicked "Express" and selected a version for ESP-IDF. Then, I clicked "install".
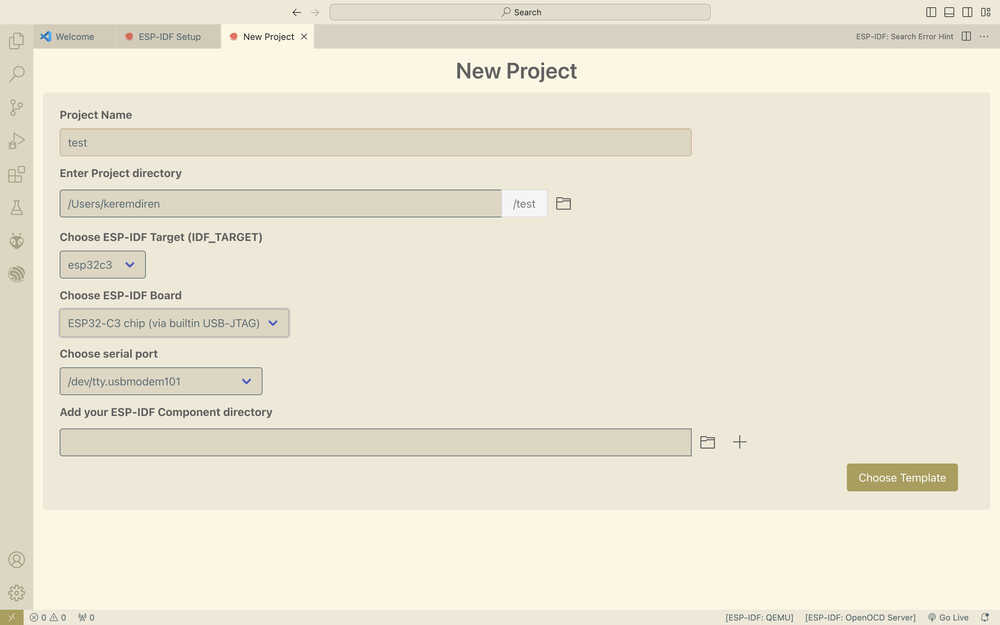
Click "new project".
Set the settings according to the board you're using and the port you connected it to. Then, click choose template.
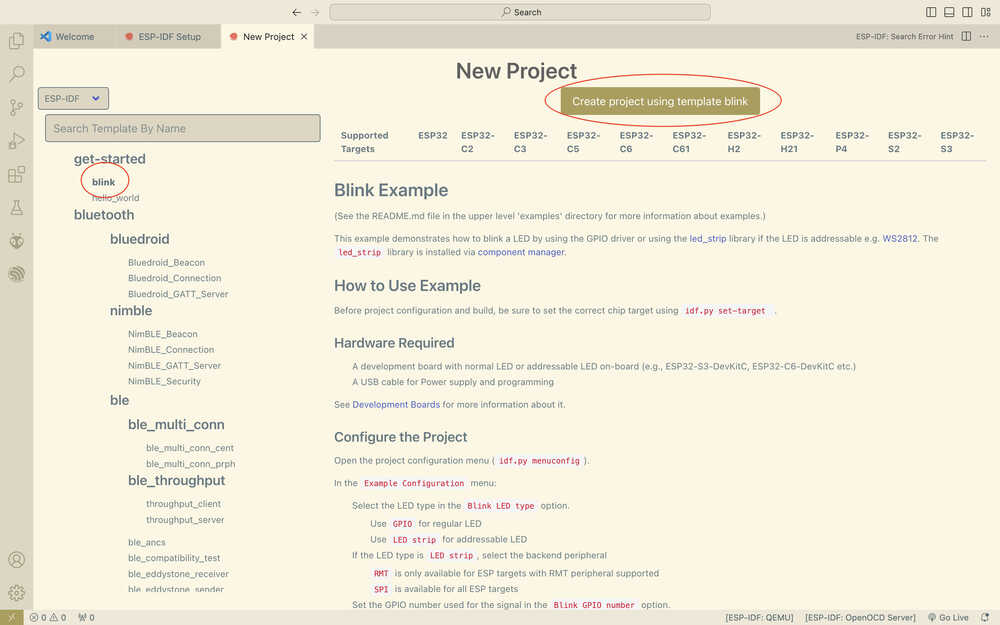
Click to your desired template and click the "create project using template" button.
Accept the request that asks whether it should open the file or not.
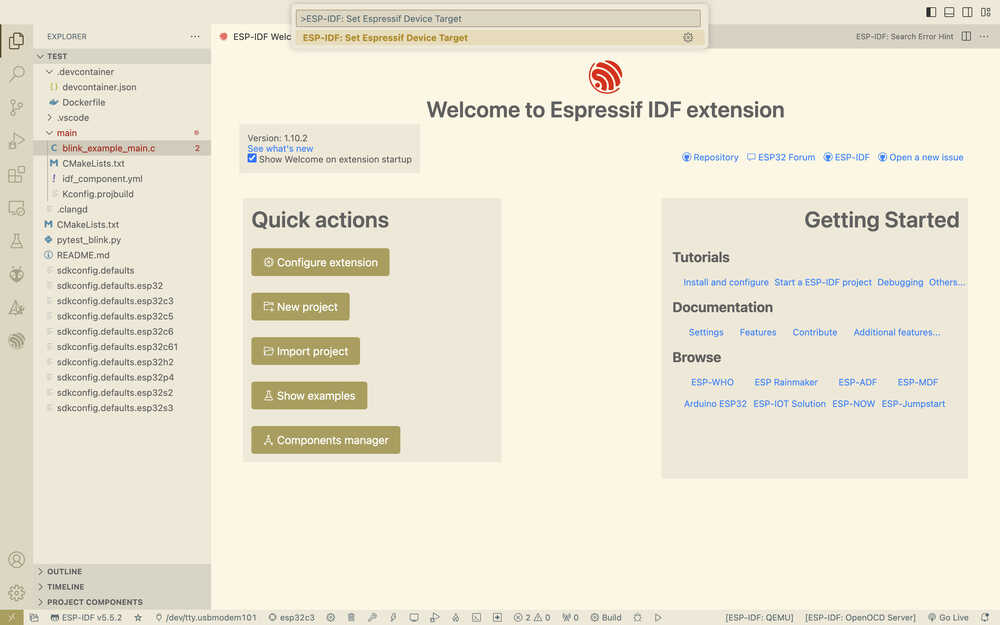
Click CTRL+Shift+P, then write ESP-IDF: Set Espressif Device Target, then select your board.
Click CTRL+Shift+P again and write the following text.
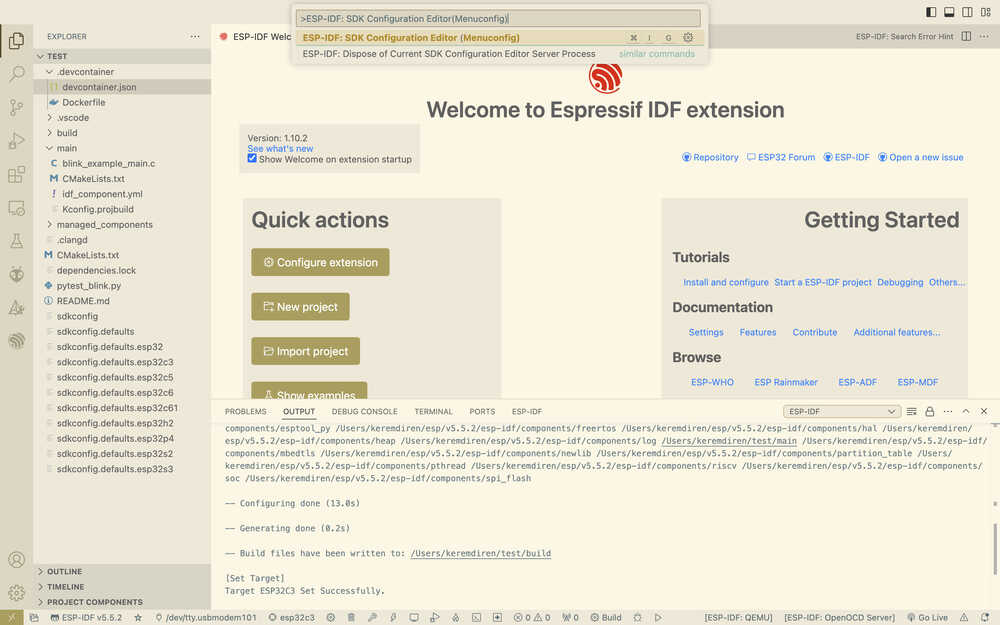
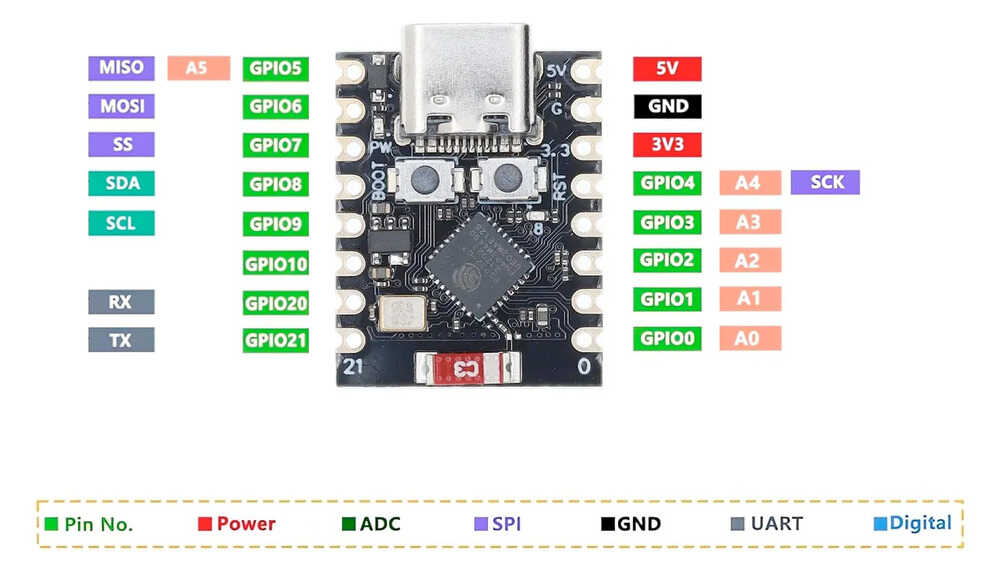
From there, set the "Blink GPIO Number" to the pin you want. Here's the pins of ESP32 C3
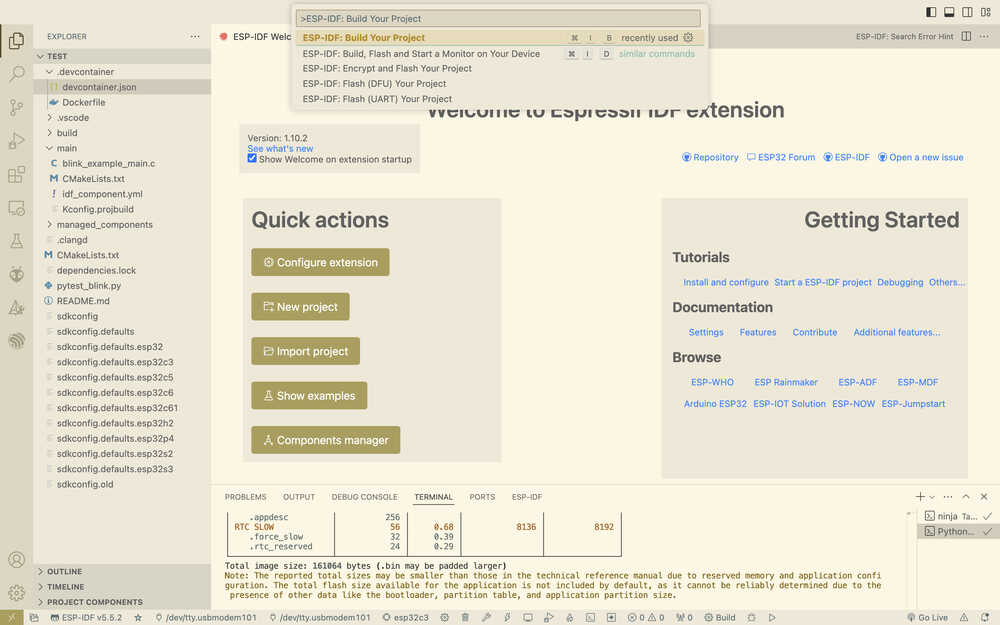
Write the ESP-IDF: Build your project command.
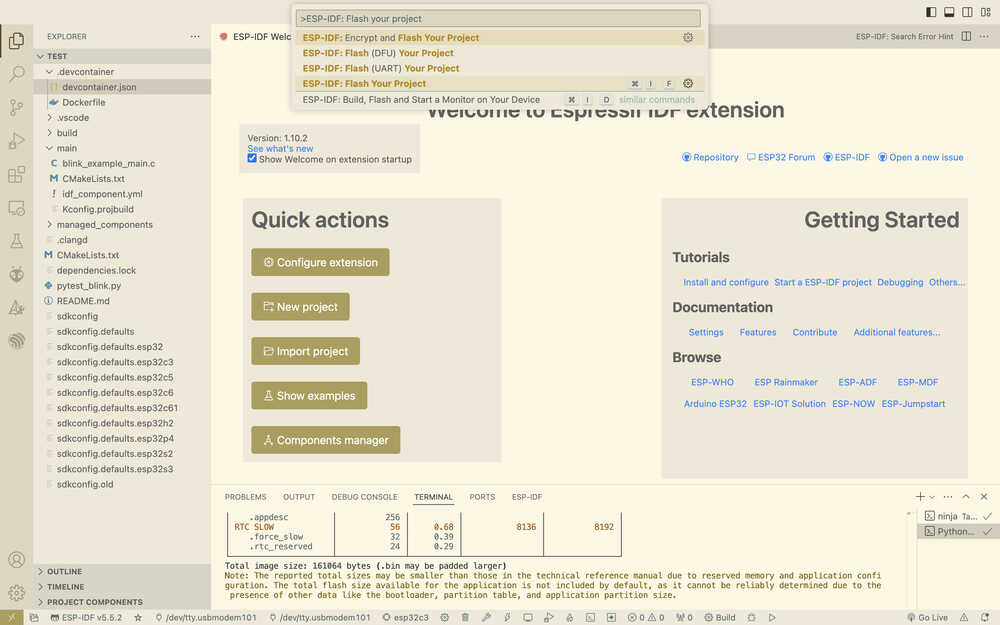
Write the ESP-IDF: Flash your project command.
While doing this, I got help from ChatGPT and the tutorial in VSCode.
ESP-IDF with VSCode definitely seems kind of confusing at first. However, as the user keeps using it, the commands etc. would be pretty useful. Basically, the UI is complicated but great when you know how to use it.